Posts

Another levitation

Image
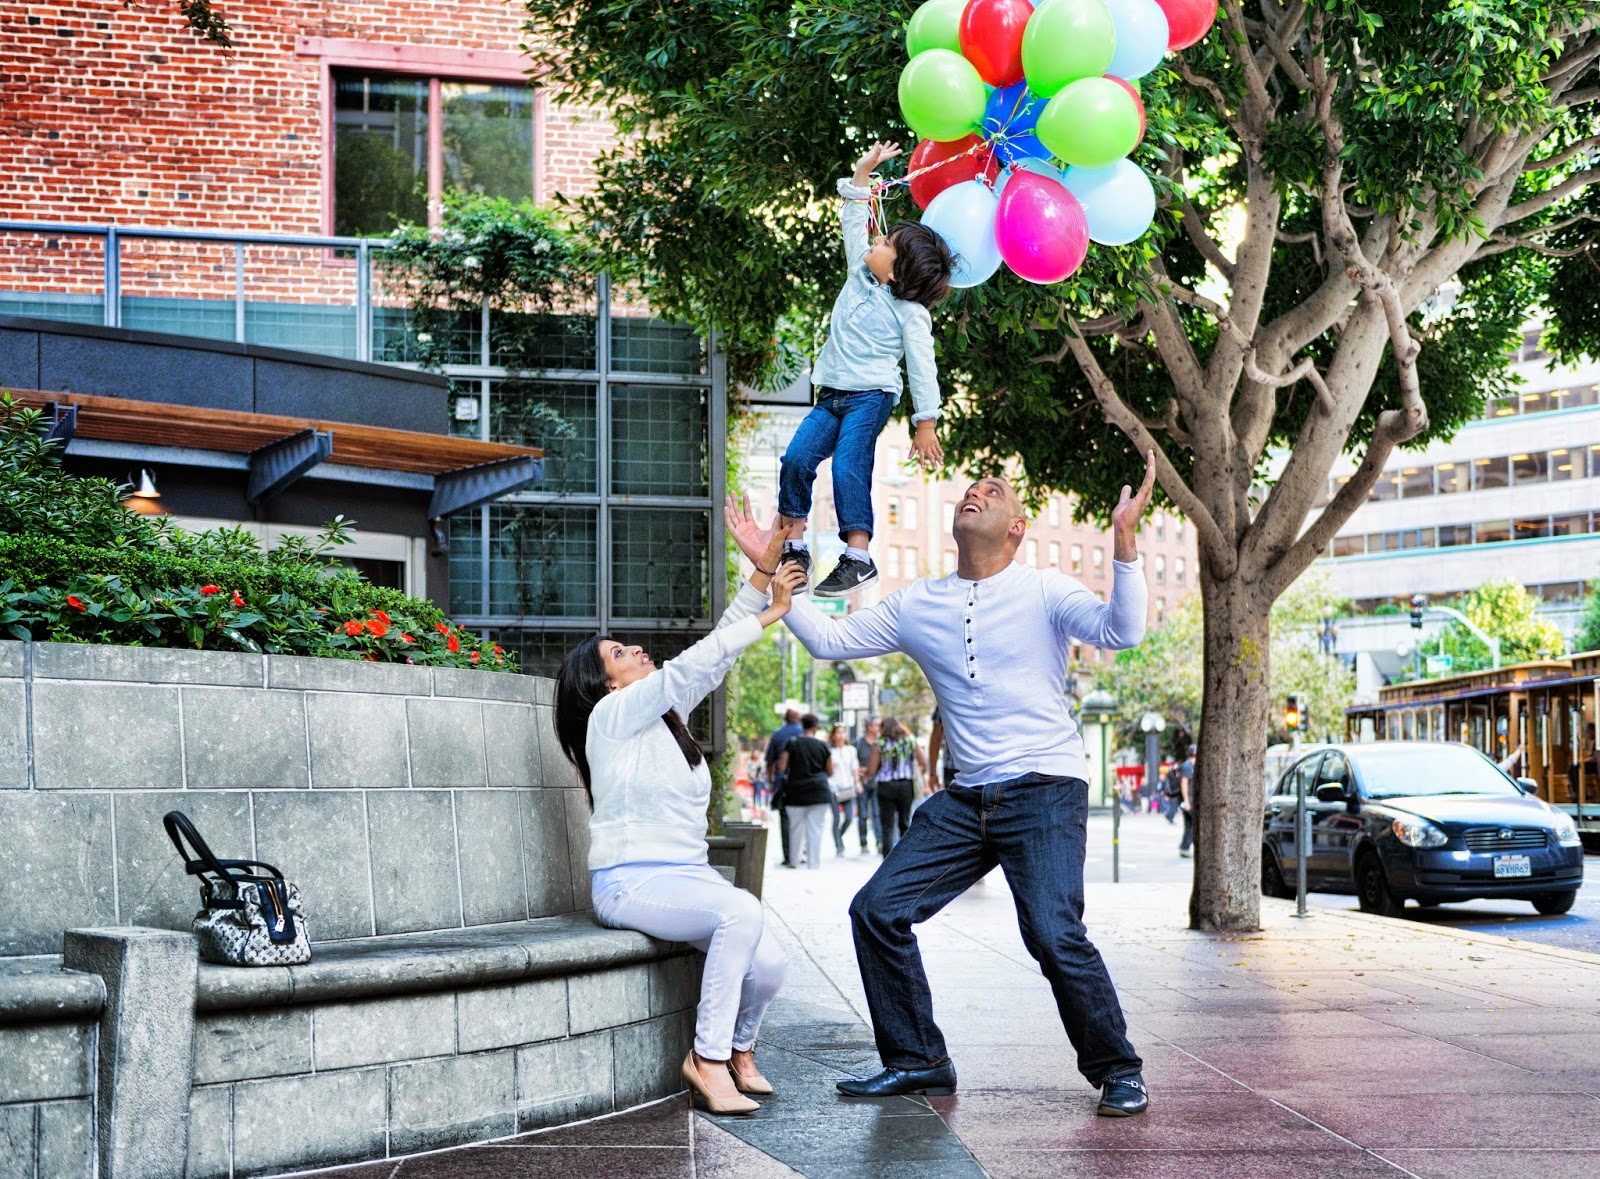
You've seen lots of "levitation" images and many of you have probably created your own by now. I created the image above for a Holiday Card. During their family shoot on the streets, mum suddenly asked if there was any way we could achieve a shot with her son floating with his balloons. I had no tripod or assistant along with me but after a quick glance around, this came together in my mind. First off I took a photo to set up the position of Mom and her son "floating off". As you can see I coached my clients to become actors for a while and they delivered a great Oscar seeking performance. The second and final part of the image was a shot of Dad looking up at his "floating" offspring. As mentioned earlier, I had no tripod to lock the camera down with so I was shooting while sitting on the sidewalk and trying to direct the family between the 2 shots without moving the camera too much. Inevitably there was some movement of the camera in b...

An Alternative to Photoshop

Image
We still have to keep watching to see if this headline can stand up for itself without needing a question mark, but maybe… Last night I signed up with Affinity Software and downloaded their beta version of Affinity Photo . I played with it for about an hour last night and by the end of that time I was finding my way around the package quite well. And that was without watching the intro video or reading any manuals. Like Photoshop , it is a 2 step offering. It has the RAW conversion engine with all the usual functions we're used to seeing. I was impressed that it also opened all my native NEF Nikon files with no trouble so it seems to be loaded with very up to date RAW processing profiles. After processing your RAW file you can move across to the rest of the package to take advantage of layers, filters, adjustments, and all the other toys that are fun to play with. It seems fairly agile and lets you do complex warps etc. really quickly. I'm going to spend more time wit...

Taking Stock: 2014

Image
First of all let me wish you a happy and prosperous 2015! 2014 was a busy year for assignments and other projects. After prioritizing my work for the year my stock photography was given the least preference so additions to my body of stock photography work for 2014 were minimal. Even so, I managed to do 515 stock image sales during the course of the year. I was also able to re-license some of my 2013 images that clients requested extended usage on. My 1st image sale of 2014 was this one: The photography was done in San Francisco and the image is Royalty Free and is model released. This image has had 9 sales during 2014. And here is my last stock image sale of 2014: This was sold on December 31st and shows the National Assembly and Government Buildings  in Belize. It seems quite fitting as I am currently in Belize. This photo was taken in Belmopan in 2013 where I specifically did a shoot of the Government Buildings for submission to the image libraries I contribut...

Put a polarizer on the front of your lens

Image
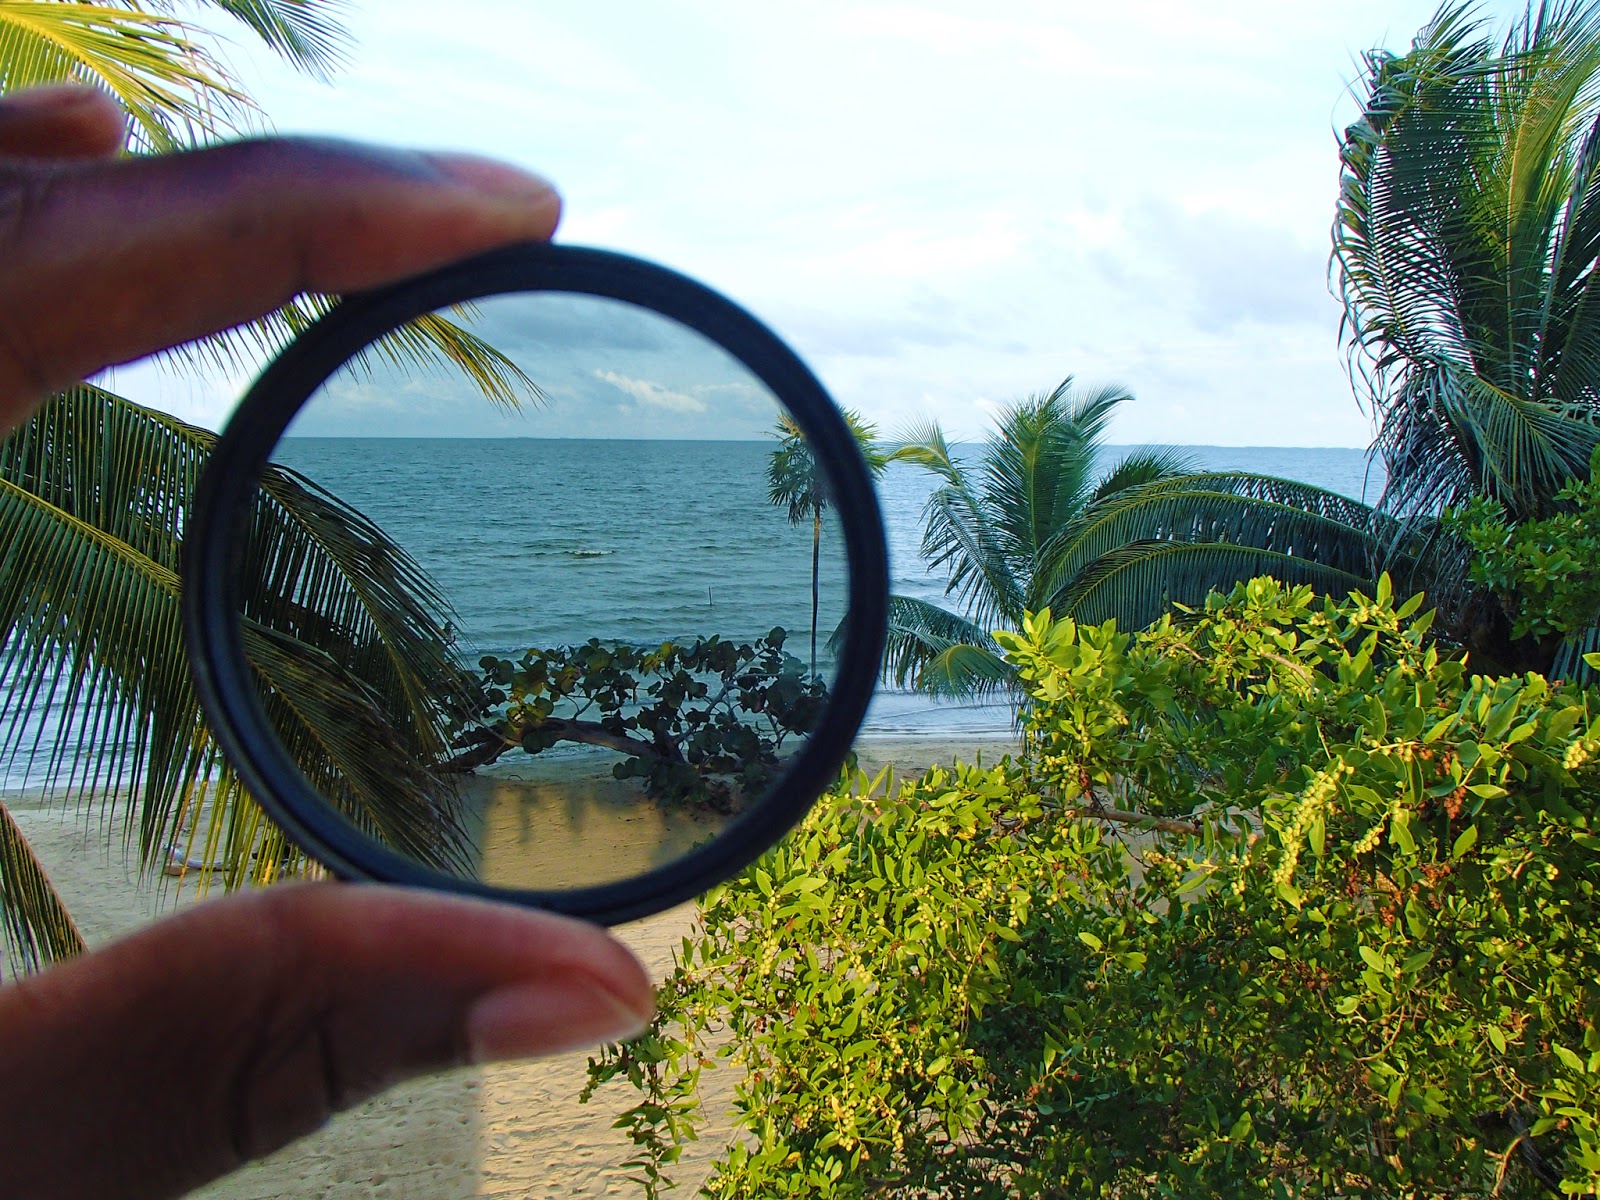
You've experienced the enhanced view of the world about you when you pop on your good quality sunglasses on brighter days. The extra contrast, definition, and colour resolution that keeps everything you see looking clear and three dimensional. The effect that a polarizing filter adds to your photos is one that isn't easily, if at all, achievable using post processing software. Because what your polarizer is doing for you is filtering out the effect of light reflecting back from the surfaces it hits. In turn you get more saturated colours and if required, bluer skies. I'm using a Circular Polarizing Filter (CPL) on my DSLR for these examples. In this example above, the sun is behind me and slightly to my right. Without making any colour tweaks to my files this is what I got using the same settings. The only difference is that I overexposed by 2 stops for the polarized shot to take into account the darkness of my filter. Most of the dark reflections in the water hav...

Take control converting your photos to black and white

Image
There are a few ways to convert your colour photos to black and white in Photoshop. For some people, the simplest thing to do is to use the Convert to Grayscale drop down menu. The results are often quite flat and dull looking. I used the Convert to Grayscale function for the image above left. I have also used levels to increase the contrast and mid tones in an attempt to make the end result more appealing to look at. If you're happy with this image then no need to go further. In the image on the right, I used a Black and white adjustment layer to do the conversion. Here it's shown side by side with the colour image for reference.  Let's take another closer look at the results from the 2 methods I've mentioned for converting colour images to black and white. In this closer view you can clearly see that I have been able to control the different colour tones of the image while making the conversion resulting in more detail in the shadow areas and clear...

Air BnB Campaign Shoot in Valencia

Image
Valencia was the first of the locations for this AirBnB campaign that I worked on and it was really nice to find myself in Europe again. In addition to the location shoots that were planned, the film director also wanted to include highlights of the Falles festivities in her piece. After spending the morning checking out the available locations, the spaces were confirmed and everyone was ready to roll. Because of the festivities, many of the streets were decorated with colourful bunting.  On the first day of shooting we worked through some sets and then contributed to the street decorations with laundry props that were used when we worked with a model for the scene that was set up to be shot from across the street. The following morning we shot the street scene with our poster boy model viewed from a balcony. It turned out to be a busy right of way but the production crew did a great job of managing to stop people appearing in shot without really annoyi...

Air BnB Campaign Shoot in Iceland

Image
I'd never visited Iceland previous to this shoot but it was on my list of places I wanted to visit. And now that I've been there, it's definitely high up on my list of places I'd like to visit on my own itinerary. It really does have a magical undertone to it all and the mix of fire and ice is readily apparent as you travel around. Photo by Marisa Quiter A 4:30 am start got us to the location and on set ready for the first shots of the day. While the film and production teams were carrying out some final touches for their shots, I spent a little time outside capturing some general shots of the views surrounding the location. It was still before sunrise so I was glad that I was wearing lots of layers including thermals, a fleece, down jacket, Goretex over jacket, scarf, gloves and my Jamaican Bobsleigh Team beanie hat! Eventually the sunlight began to filter through the cloudy sky and we are able to execute our shot lists and anything else that we sa...